Fall weather has finally arrived here in Southern Arizona. The cold weather is usually at least a month late in this part of the country, but it does arrive eventually.
Temperatures are dropping and I’m getting excited for tea, soup, and cozy evenings reading by the fireplace.
This also means that certain, yearly, recurring events are soon upon us. That’s right, I’m talking about holiday-pocalypse 2014!
What? You think I’m being over dramatic? That if I had TiVo it would be filled with soap operas and telenovelas?
Ok, maybe I’m being a touch sensational, but holidays can be quite stressful for many of us on the plant-based path.
It may mean attending dinners filled with old favorites that you must forgo in order to stand by your healthy values.
It may mean cooking dinner for relatives that love to make fun of your plant-based choices.
In general it means standing out like a sore thumb in a culture that doesn’t see food as medicine, and the incredible power that we have to shift our health destiny based on the food choices that we make.
I know the challenges the holidays can bring, so in the coming weeks I’ll share some of my best ideas on how to truly enjoy the holidays while keeping your health and social standing intact…not always the easiest thing to do!
Today, I’ll get started with one of my favorite ways to win over family and friends and make sure that you truly enjoy yourself over the holidays.
The ol’ make an incredible, delectable, mouth watering dish that will impress the pants off everyone in the room.
You don’t even have to mention the fact that it’s plant-based, whole food, and free of refined sugar until someone says, “Wow, this is incredible! What’s in it?”
I love the look on their faces when they find out that the delectable dessert they just inhaled was actually as healthy as it was delicious.
As you know, I’m a big believer in simplicity. Most of my meals are very simple, and think it’s a great strategy for long-term success on the plant-based path.
But sometimes, you just need to knock the socks off your mother-in-law with an incredible culinary delight.
To that end, I asked my wonderful partner Regan to share one of her recipes with you. Of course I’m biased, but she is an absolutely fantastic chef with the credentials to back it up.

Regan
Originally trained in the french culinary tradition, she became interested in the plant-based lifestyle when a loved one was told to try eating “raw” in order address a serious health challenge.
This led her to a 6-month apprenticeship at a center specializing in plant-based nutrition where she was later hired as a chef (also where we just so happened to meet).
She now does chef consulting, health coaching, and makes the most incredible plant-based dishes that I’ve ever had.
In fact, I’ve asked her to play a big role in the future of this little site, so this will be the first of many wonderful recipes to come.
So without further ado, here is Regan to introduce the recipe:
Better Than Pumpkin Pie
When I walk into a grocery store in Autumn, I am overwhelmed by all the different varieties of squash available. Sometimes I think “What the heck are the fall decorations doing in the produce aisle?”

Recently, I tasted one of these fall decorations — the Kabocha Squash, sometimes referred to as a Japanese Pumpkin. This squash is a wonderful replacement for pumpkin. The texture is creamier and the taste, sweeter. The result is a very healthy, out of this world pie.
Ingredients
Filling
-
3 Cups Kabocha Squash, Cooked and Pureed
-
2 Cups Cashews or Cashew Pieces, Soaked 8 Hours
-
½ Cup Coconut Oil
-
½ Cup Maple Syrup
-
1 Tbs Lemon Juice
-
1 Tbs Cinnamon
-
2 tsp Ginger Powder
-
1 tsp Vanilla Powder or 2 tsp of Vanilla Extract
-
¼ tsp Nutmeg
-
¼ tsp Cloves
-
¼ tsp Salt
-
2 Tbs Agar Agar Flakes, Dissolved in Water
Crust
-
1 Cup Buckwheat Groats, Whole or Ground Into Flour
-
1 Cup Shredded Coconut, Groud Into Flour
-
¾ Cup Pecans, Ground Into Meal
-
¼ Cup Coconut Oil
-
3 Tbs Maple Syrup
-
1 tsp Vanilla Powder or 1 ½ tsp Vanilla Extract
-
¼ Cup Water
-
½ tsp Salt
Instructions
-
Preheat oven to 350༠
-
In a Vitamix, grind the buckwheat groats into a flour and scrape into a medium large bowl. If you would like a crunchy crust, leave the buckwheat groats whole.
-
Grind the shredded coconut into a flour and transfer into the same bowl as the buckwheat flour.
-
Place the pecans in the Vitamix or food processor and pulse them until they are crumbly, careful not to blend too long or you will start to form pecan butter (...a delicious mistake!).
-
Add the pecan meal and the remaining crust ingredients, mixing together until everything is sticky. If the mixture is not sticky enough, add some water, a little bit at a time.
-
Press crust evenly into a springform pan
-
Bake for 20 - 30 minutes or until golden brown.
-
Allow pie crust to cool before adding the filling.
-
In a saucepan, bring 1 and ¼ cups of water to a boil
-
Add 2 Tbsp of Agar-Agar flakes and simmer until completely dissolved.
-
Pour mixture in blender. In the same blender, add all of the filling ingredients except coconut oil.
-
Blend at high speed until everything is smooth and completely combined.
-
Dip a finger or spoon into the mixture and taste it. Make sure it is well balanced and adjusted to your preferences.
-
Lastly, add the coconut oil. Using the tamper to scrape down the sides in a clockwise motion. Do not leave the blender running too long or the coconut oil will become over processed and take on an odd flavor. If you would rather not use the blender for this step or if the coconut oil does not completely blend in after 30 seconds, use a rubber spatula to fold in the oil, until completely combined.
-
Pour the filling into the crust and place pie in the freezer to set.
-
Freeze until firm, then transfer to the refrigerator. The pie should keep for about 5 days.
5.0.10
https://www.truewellth.org/better-than-pumpkin-pie

Crust

Filling

Considerations
There were a few tips I wanted to share with all of you about the process of making this pie. They will save you the heartache of making a whole pie only to find out that it tastes just a little bit off.
- I use a Vitamix. The Vitamix has a tamper attachment, which allows you to scrape down the sides of a very full blender while blending. Ensuring that everything is smoothly combined as quickly as possible.
- I do not use a traditional pie pan when I make pies. I prefer to use a springform pan. I think they are easier to work with and the presentation is nicer.
- Remember all equipment varies. For example, my oven may cook my pie crust slightly quicker than your oven. Ovens in general circulate heat differently. This rule applies to blenders, food processors, etc. This means, always keep an eye on things, give it care and take it slow.
Happy baking!

We will never sell your information or spam you, ever.
Regan is a sought after wellness educator, health coach, and live food chef specializing in Conscious Eating and Spiritual Nutrition.


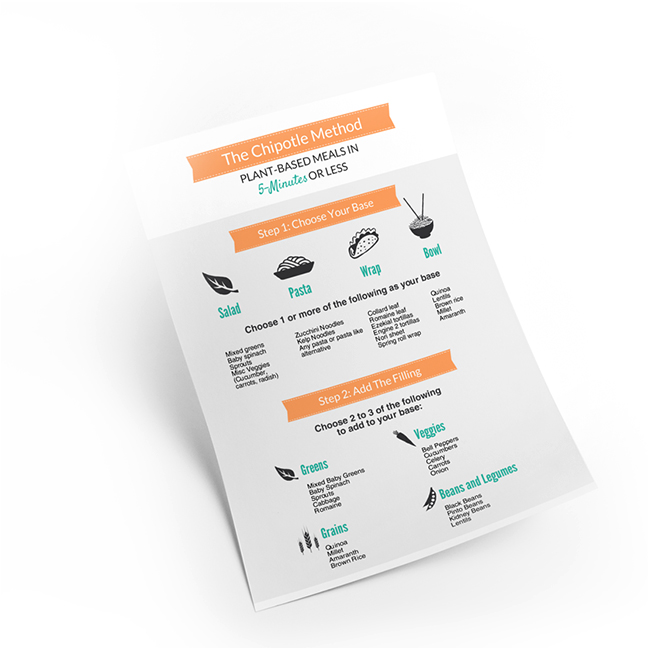
 Feel like you live in the kitchen? Get our FREE Chipotle Method PDF, Recipe Sampler, and Email Course and learn how to make quick, easy meals that are delicious and satisfying.
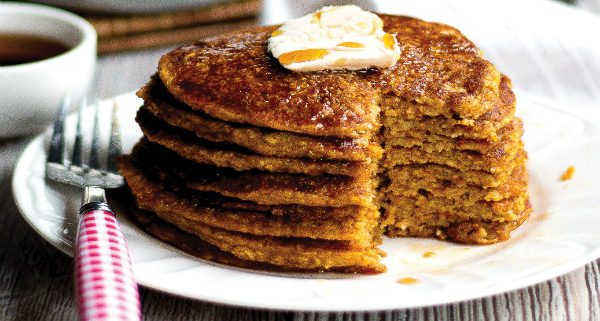
 I recently had the honor of